 Register


CentOS Web Panel (CWP) is a web hosting panel that allows you to manage dedicated Servers as well as VPS servers. The web panel offers a lot of services such as websites, packages, database servers, mail servers, PHP settings, and web servers. CentOS web hosting panel is free for use and uses Postfix and Dovecot servers for mailing. Let us look at the steps required to set up a mail server using the CWP.
Requirements:
- Server IP Address
- Root account ID and Password
Steps:
Step 1-:
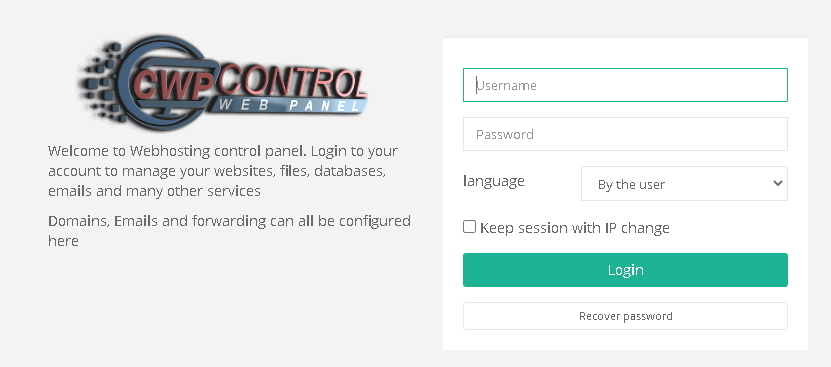
Log In to the CWP (CentOS Web Panel). If you have SSL (Secure Sockets Layer) use this format-
“https://your-server-i.p:2031”.
Otherwise use this format
“http://your-server-i.p:2030”. (Alternatively, use this: “192.168.1.183:2030”) and Enter your Login credentials.
Step 2-:
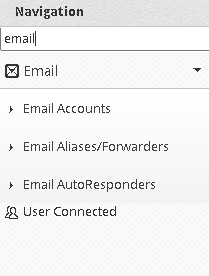
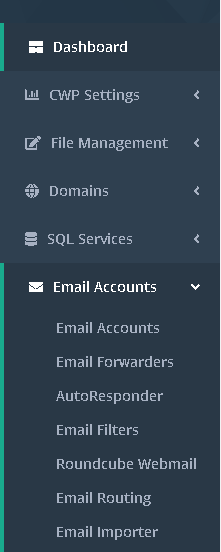
Under the Navigation tab, search for “Email Accounts” and click on it. A new page will open displaying all email accounts on the server.
Step 3-:
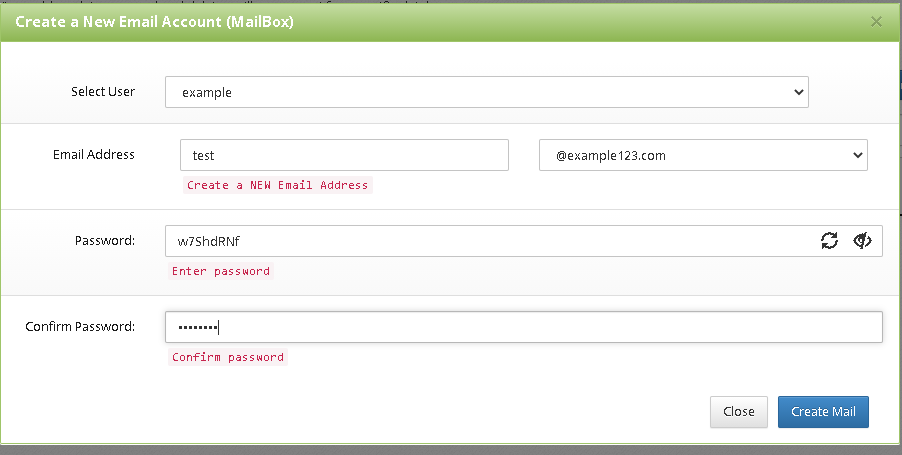
Click on the “Add new Domain mail” button on the right-hand side. A dialog box opens up. Select the user and then type in the email and password you wish to add.
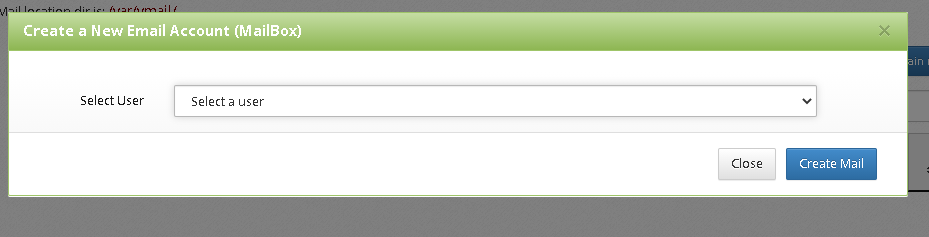
Step 4-:
In the example given below, the “example” is the user on “example123.com” with mail id: test@example123.com. Click on the “Create Mail” button. The email account has been successfully created.
The mail account will now appear on the “Email Accounts” screen.
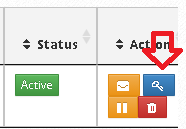
These are the additional actions that can be performed on your mail:
Autologin to Roundcube:
Click on the “message box” icon on the right-hand side of your selected email account.

This will redirect you to the Roundcube webmail interface.

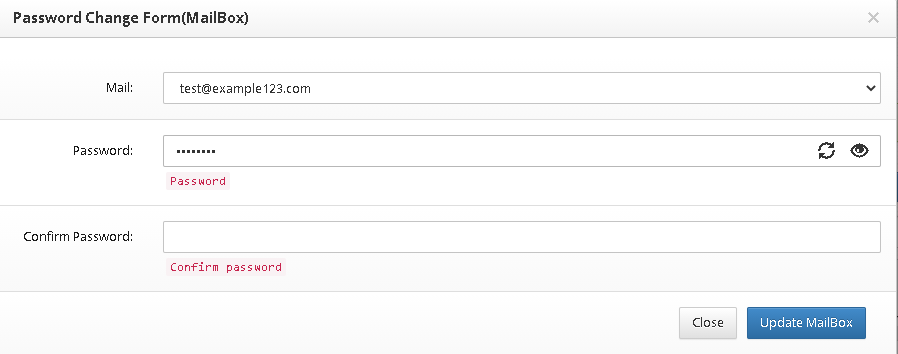
Changing the Password:
Select your email account. Under the “Action” tab, click on the blue key icon.
The Web Panel automatically creates a secure new password for you. Be sure to copy it and remember it.
Read More: How to access Windows Server through RDP from Windows?
Suspending and Re-activating email account:
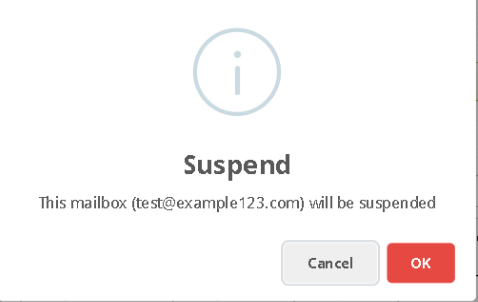
- In case you wish to suspend the email account. Click on the yellow pause button under the “Actions” tab. A prompt comes up. Click on OK to suspend the account.

- If you wish to re-activate the suspended account, you can click on the green play button under the “Actions” tab.

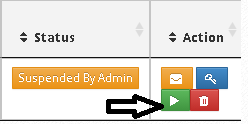
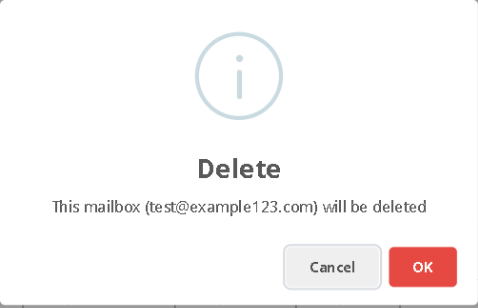
Deleting the email account:
Click on the red trash bin icon under the “Actions” tab. A prompt box pops up. Click on OK to delete the email account.
In case you wish to create an email account with non-root access, follow the steps given below:
1. Log in to your user panel using this link, “https://your-server-i.p:2083/login/”. Make sure you modify the address according to your server and port.
Read more: Linux Reseller Hosting vs. Windows Reseller Hosting: Which one would you choose? and Why?
2. Go to Dashboard> Email Accounts> Click on the “Add a New MailBox” button on the page that opens.
3. Enter the email address and a password will be generated. Copy the password and click on Add button.

4. A new email account has been created.
Some postfix and dovecot service commands used to check the service status and restart services from the SSH terminal:
Steps:
- Login to the CWP panel using this URL: https://your-server-i.p:2031 Make sure that you change the address according to your server IP and port.
- Open the terminal and use the commands given below
POSTFIX & DOVECOT service Commands and their functions:
POSTFIX Service
# systemctl start postfix
# systemctl enable postfix
# systemctl status postfix
# systemctl restart httpd
# systemctl start cwpsrv
DOVECOT SERVICE
# systemctl start dovecot
# systemctl enable dovecot
# systemctl status dovecot
# systemctl enable httpd
# systemctl enable cwpsrv
Roundcube webmail interface:
- Login URL:
https://server-hostname:2087/roundcube.
Make sure that you change the address according to your server IP and port. - Start the services of the mail account and you can get started.
- Click on Compose Mail to write a new mail.
- The mail logs are in the “/var/log/maillog file”
Conclusion:
This article discussed a brief about the CWP (CentOS Web Panel) and how this web hosting panel can be used to create email accounts. The article provides steps on creating email accounts (with both root user and non-root user), using the Roundcube webmail interface, changing the password, suspending, deleting, and re-activating your email account, and how to compose a new mail in CWP.