Ever wanted to make your hosting setup look more professional and branded? Using a private name server, like ns1.yourdomain.com, is a great way to do just that. Instead of using your hosting provider’s generic name servers, you can use your own. It’s simpler than it sounds, and you can do it right from your Plesk panel. Let’s walk through the steps.
This kind of setup is a perfect example of where having expert Plesk Server Management Services can make things run smoothly from start to finish.
Step-by-Step Guide to Creating Your Private Name Server
- Log in and Navigate:
First, log in to your Plesk panel. On the left-hand sidebar, find and click on “Websites & Domains.” Then, look for the domain you want to use for your name servers and click on “Hosting & DNS.” This is your control center for all DNS-related changes.

- Access the Name Server Settings:
Inside the “Hosting & DNS” section, you’ll see an option labeled “Name Servers.” Click on it. Here, you might see existing name server entries (like ns1.yourdomain.com and ns2.yourdomain.com).
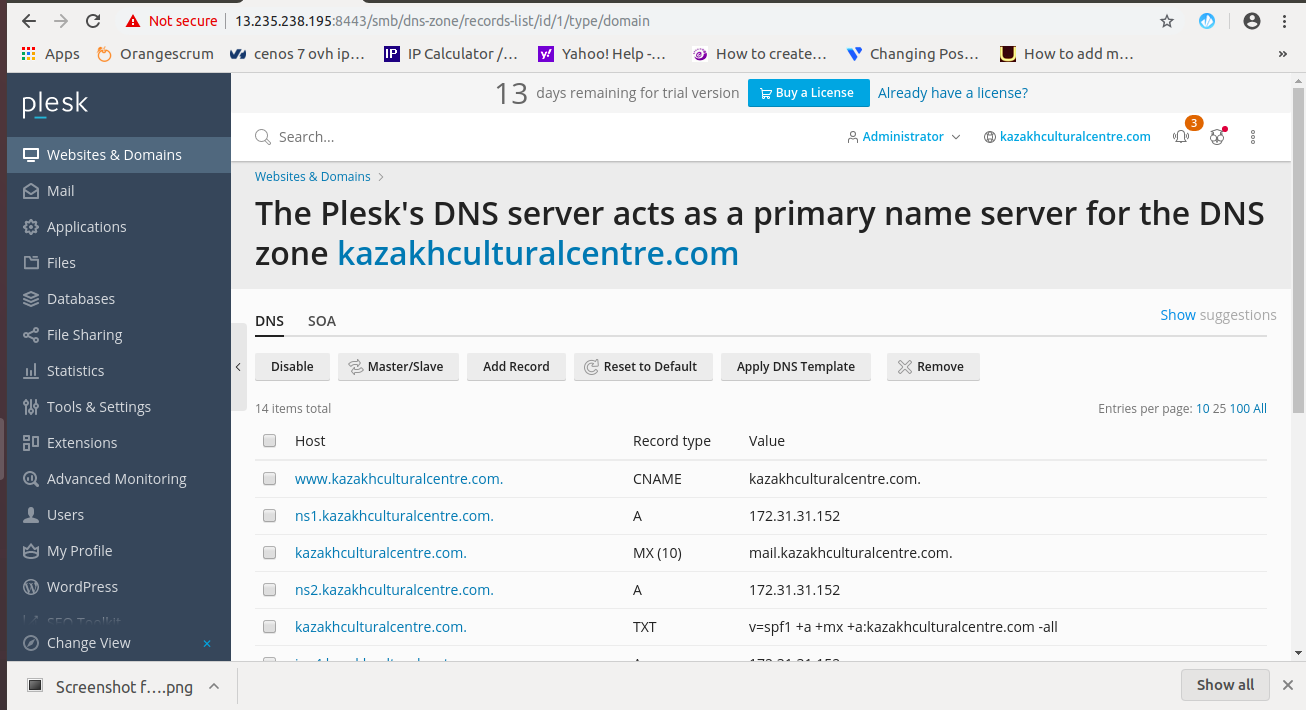
- Create or Modify Your Name Servers:
- If you don’t see your name servers listed, click the “Add Record” button. A new line will appear. In the record type dropdown, select “NS” (which stands for Name Server).
- If entries already exist, you can simply edit them to match the names you want.

- Choose Your Names:
Now, decide on your name server hostnames. The standard practice is to use your main domain and create two servers, for example:- ns1.yourdomain.com
- ns2.yourdomain.com
You can customize these names to fit your brand. Just type the hostname (like “ns1”) into the appropriate field.

- Save and Point Your Domain:
Once you’ve entered your chosen names, save the changes in Plesk. Crucially, the final step happens where you registered your domain (your domain registrar). You must go there and change your domain’s official name servers to the new private ones you just created (e.g., ns1.yourdomain.com and ns2.yourdomain.com).
Important Note: Changes like this can sometimes feel tricky, and mistakes can make your website unreachable. If you’re unsure about any step, especially updating records at your registrar, it’s a smart move to get help. A dedicated Plesk Support Plan can provide the guidance you need to ensure this transition happens without any downtime.
And there you have it! You’ve just set up a professional, branded name server for your domain. Managing these settings and your server’s overall health is what comprehensive Plesk Support Services are all about, giving you peace of mind so you can focus on your website.how quick and satisfying it is to see your own name servers in action.
Built-In Speed Tools Ready to Use
Our team specializes in Plesk Server Management Services and handles tasks like private name server setup every day. We can take care of this for you quickly and correctly, so you don’t have to worry about the technical details

He is the CEO and Founder with over a decade of experience in cloud infrastructure, DevOps, and server optimization. With a strong vision and hands-on leadership approach, he has built scalable, secure, and high-performance cloud solutions trusted by businesses across industries.